- How to Register with String Masters?
- What payment methods are accepted on String Masters when paying for a lesson?
- What web browsers are supported?
- What technology is required to take or give online lessons?
- What is a binder?
- How to use the String Masters Lesson Space
- Group Lesson Video Archives
- How should I prepare for my lesson?
- How do I attend a lesson?
- How to Add a Binder
- How to Add String Masters Content to a Binder
- How to Add your Own Content to a Binder
- How to Add Assignments to a Binder
- How to Add Notes to a Binder
- Can I use String Masters to Teach lessons if I don't teach one of your promoted string instruments?
- How do I setup my studio?
- How do I add a student to my Studio?
- What is a lesson invitation?
- How should I prepare for my lesson?
- How to Add a Binder
- How to Add your Own Content to a Binder
- How to Add String Masters Content to a Binder
- How to Add Notes to a Binder
- How to Add Assignments to a Binder
- How do I get paid?
- Can students pay me through String Masters?
- Can I still use String Masters to teach lessons if my student pays me directly for lessons?
- I'm hearing an Echo
- Setting your camera/microphone permissions in Google Chrome on Apple computers and Windows computers
- My sound is choppy or cutting in and out
- My Sound is Muffled
- My instrument isn't heard at lower or higher ranges
- I'm hearing background noise
- Setting your camera/microphone permissions on Android Devices
- I can’t hear others in a String Masters lessons
- Setting your camera/microphone permissions on iPad
To register with String Masters, do the following:
- In a browser window, navigate to https://stringmasters.com/
- Click the 'Register' button
 found in the upper right corner of the String Masters landing page
 - Enter the mandatory fields in the Registration Form, including picking an appropriate membership plan that works for you, and then click 'Sign Me Up'.
- An email will be sent to you to complete the registration process.
Be sure to check your spam/junk/clutter folders if you do not see the email in your inbox.
When paying for a lesson we currently accept Visa, Mastercard and American Express in most countries. Several more are accepted in Canada.
We recommend using Google Chrome (latest version) on all devices except the Apple iPad and Apple iPhone. On the Apple iPad and Apple iPhone we recommend using Safari (latest release version – minimum supported version is 12)
To take or teach lessons on String Masters you require the following technology:
- A computer or tablet manufactured within the past two years
- A computer or tablet webcam supporting video and audio with echo-cancellation (this might not be stated right on your device – almost all made within the past 2 years have this)
- A stable, internet connection supporting upload and download each of 1Mbit/s (megabit per second). For cellular connections, this is generally LTE or better. You can test your internet speed at many online speed test locations – search “speed test”. Please note that online speed tests measure point-in-time bandwidth. Your actual connection speed can be affected by coverage and by other users in your household or on your network (watching Netflix, etc.).
- We recommend using Google Chrome (latest version) on all devices except the Apple iPad and Apple iPhone. On the Apple iPad and Apple iPhone we recommend using Safari (latest release version – minimum supported version is 11).
- Your video camera and microphone must be enabled to work in your browser (your browser will typically ask this the first time you join a lesson, but this is based on your browser’s settings), and your speaker volume must be high enough to hear the other person
If you have any questions regarding your specific technology you can contact String Masters technicians at support@stringmasters.com
Binders are a way in which you can easily organize your favorite musical content like sheet music, videos, notes and more! You can add content from our String Masters library into a binder as well as upload your own content that you have outside of String Masters. You can use binders during private practice time or bring content from a binder into an online lesson.
The String Masters’ lesson space is packed with features to ensure a high quality, professional music lesson. The video below is a brief tutorial on how to use all of the features in the lesson space and will prepare you to make the most of your String Masters lessons.
String Masters automatically records your lessons and makes them available to all lesson attendees after the lesson is over. For Group Lessons, lesson recordings display a maximum 9 participants in the recorded video. Specifically, the first 9 attendees to stream video are recorded and will appear in the recorded lesson video. If a participant stops streaming video during the lesson then the next participant who is streaming video will in the recording.
To make the most of your virtual lesson we recommend that you run through the following check list before you attend your online session:
- Set up in a quiet room with your computer or tablet. Make sure there is enough light in the room.
- Ensure your video and audio are properly functioning on your computer. If you are using external microphone or headset be sure to check that they are working and properly connected to your computer (You can test your computer and hardware here)
- Have your cell phone handy just in case you need to reach your teacher for any reason outside of the virtual lesson or in case you have trouble connecting.
- Position yourself seated or standing in a comfortable spot about one arm’s length away from your webcam. Be sure that you are not too far away as you will likely need to read sheet music that is on your computer screen.
When you are ready Attend Your Lesson on the String Masters site.
You can attend a scheduled lesson in one of two ways:
- Using the email reminder that is sent to you 24 hours in advance of your lesson
- From the Lesson Center on the String Masters site
Using the email reminder
To attend a lesson using the email reminder, do the following:
- Locate the Lesson Reminder email that was sent to you from the String Masters site
- Click the 'View my Lesson’ button found in the body of the email
- Once you are logged into the site you will be taken to the lesson details screen
- Click the ‘Attend Lesson’ button
 to enter the lesson space
 - When you are ready to get connected with your Instructor simply
Click the PHONE button
 located at the top, right-hand of your screen!
Note that you cannot start/attend your virtual lesson any earlier than
10 minutes ahead of the lesson start time.
located at the top, right-hand of your screen!
Note that you cannot start/attend your virtual lesson any earlier than
10 minutes ahead of the lesson start time.
From the Lesson Center
To attend a lesson from within the Lesson Center, do the following:
- Log into the String Masters site
- Navigate to 'My Lesson Center’
- Locate your upcoming lesson in the 'Upcoming Lessons' list
- Click the chevron
 beside the lesson you want to attend to open the lesson details
 - Click the ‘Attend Lesson’ button
to enter the lesson space
- When you are ready to get connected with your Instructor simply
Click the PHONE button
located at the top, right-hand of your screen!
Note that you cannot start/attend your virtual lesson any earlier than
10 minutes ahead of the lesson start time.
To add a binder, do the following:
- Navigate to 'MY CONTENT'
- Click the 'NEW BINDER' button

- A new binder will be created and its name will be set to '(New Binder)'
- Click the RENAME BINDER button
 to change its name
 - Enter a new Binder name
- Click the SAVE button
 located at the top left-hand of your screen
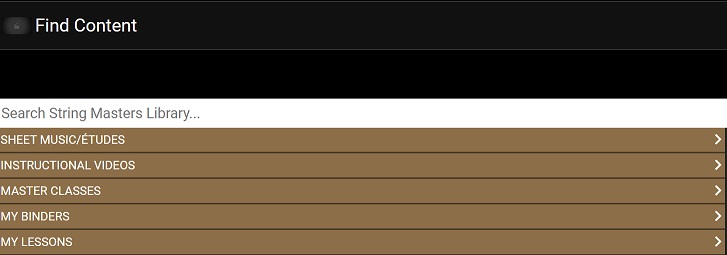
To add String Masters Content to a binder, do the following:
- Navigate to 'MY CONTENT'
- Select one of your existing Binders
- Click the FIND CONTENT button

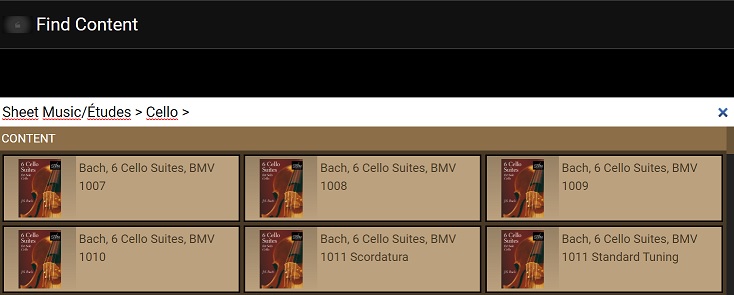
- Within the 'Find Content' page, you can find content in two ways
Using categories
- Drill down to the category that you are interested in
- Once the Content you are looking for is found, click on it and it
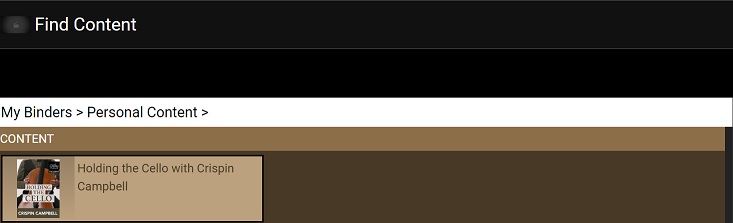
- Additionally, you can add Content from other binders or lessons by
using the 'MY BINDERS' and 'MY LESSONS' categories
- Click the CLOSE button
 located at the top left-hand of your screen
Using the search functionality
- Use the search field to find Content by title, composer or instrument
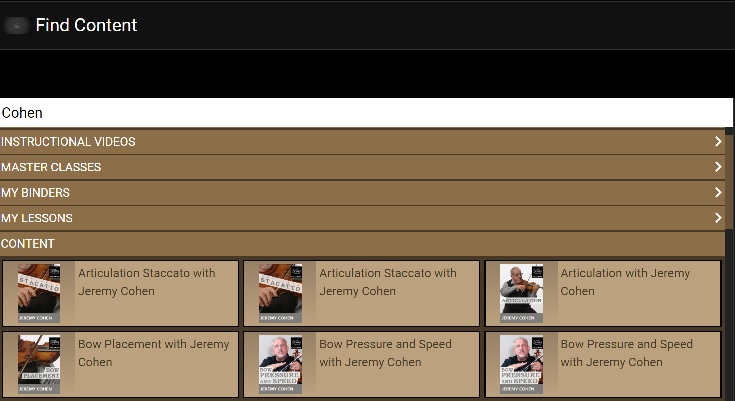
- Once the Content you are looking for is found, click on it and it will be added to your Binder
- Click the CLOSE button
located at the top left-hand of your screen
To add your own content to a binder, do the following:
- Navigate to 'MY CONTENT'
- Select one of your existing Binders
- Click the UPLOAD CONTENT button

- Drag and drop your own files to the Binder or select from a specific folder. Note that there is a 5 MB maximum file size for uploaded content.
- Click the CLOSE button
located at the top right-hand of your screen
To add an assignment to a binder, do the following:
- Navigate to 'MY CONTENT'
- Select one of your existing Binders
- Click the NEW ASSIGNMENT button

- Enter Title and Text for assignment
- Click the SAVE button
located at the top left-hand side of your screen
To add a note to a binder, do the following:
- Navigate to 'MY CONTENT'
- Select one of your existing Binders
- Click the NEW NOTE button

- Enter Title and Text for note
- Click the SAVE button
located at the top left-hand side of your screen
Absolutely! We welcome all music teachers and learners. Our proprietary String Masters Studio can be used for any music teacher. While String Masters offers exclusive, curated string-centric content and learning videos you can bring your own materials and content to support your students.
Setting up your String Masters Studio is easy! You can follow the written steps below or follow along with the video tutorial found at the bottom of this section.
Before you can teach lessons online you need to configure your studio rates and payment details found in your User Profile. To setup your rates and payment details do the following:
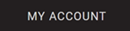
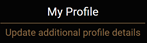
- Navigate to your User Profile by using the 'My Account' link
 found
in the String Masters menu or by clicking 'My Profile'
found
in the String Masters menu or by clicking 'My Profile'
 on 'String Masters Studio'
 - In your user profile, scroll down to the section 'About me as an Instructor' and enter your lesson rates for 30 and 60 minute lessons
- Click the Save button
 at the bottom of the profile screen
If your students will pay for their lessons using String Masters then you also need to specify how String Masters should send this payment to you.
- In your user profile, scroll down to the section 'Settlement Details'
- Choose an option in the field 'Make payments to you by..'
- Update the field values that display for the payment option you selected
- Click the Save button
 at the bottom of the profile screen
Now you can start Adding Students or Booking Lessons Instantly!
You can easily add students to your studio in two ways:
- By Clicking Add a New Student from String Masters Studio
- By 'Scheduling a Lesson' with a new student
Add a New Student from String Masters Studio
- Navigate to 'String Masters Studio'
- Scroll down to the 'Student Manager' section and click
'Add a New Student'
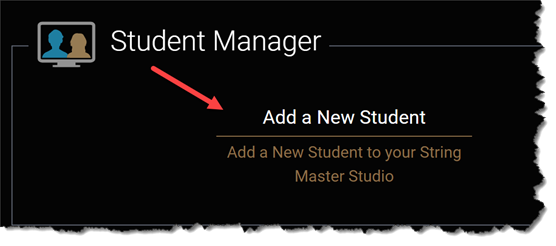
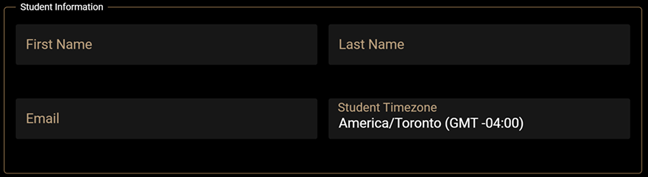
- Fill in the fields on the add student form
- Click 'Add'

Once the student is added the student will appear in your student list.
Add a New Student by scheduling a lesson
When you schedule a lesson with a new student the system will automatically add the student to your list. To schedule a lesson with a new student do the following:
- Navigate to 'String Masters Studio'
- Scroll down to the 'Lesson Center' section and click
'Schedule A Lesson'
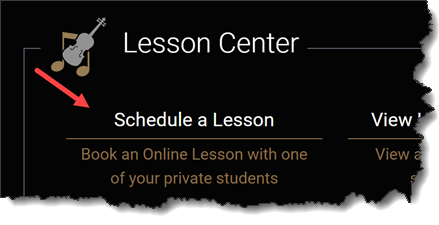
- Fill in the student information for the new student on the first step of
the booking form
- Complete the scheduling process by following the steps on the screen
Once the lesson is added, the new student will appear in your student list.
Lesson invitations are sent to students when you schedule a lesson and have indicated that the student will pay for the lesson OR you have scheduled a lesson and you have an Institutional account with String Masters.
Lesson invitations allow the student to accept the lesson booking and if required, pay for the lesson. Once a lesson invitation is confirmed by the student the lesson booking will be created and it will appear in your Upcoming Lessons list.
To make the most of your virtual lesson we recommend that you run through the following check list before you attend your online session:
- Set up in a quiet room with your computer or tablet. Make sure there is enough light in the room.
- Ensure your video and audio are properly functioning on your computer. If you are using external microphone or headset be sure to check that they are working and properly connected to your computer (You can test your computer and hardware here)
- Have your cell phone handy just in case you need to reach your student for any reason outside of the virtual lesson or in case you have trouble connecting.
- Position yourself seated or standing in a comfortable spot about one arm’s length away from your webcam. Be sure that you are not too far away as you will likely need to use sheet music that is on your computer screen.
When you are ready Attend Your Lesson on the String Masters site.
To add a binder, do the following:
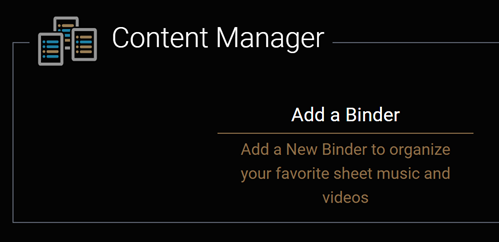
- Navigate to 'String Masters Studio'
- Scroll down to the 'Content Manager' section and click 'Add a Binder'
- A new binder will be created and its name will be set to '(New Binder)'
- Click the RENAME BINDER button
 to
change its name
to
change its name - Enter a new Binder name
- Click the SAVE button
located
at the top left-hand of your screen
To add your own content to a binder, do the following:
- Navigate to 'String Masters Studio'
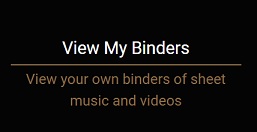
- Scroll down to the 'Content Manager' section and click
'View My Binders'
- Select one of your existing Binders
- Click the UPLOAD CONTENT button
- Drag and drop your own files to the Binder or select from a specific folder
- Click the CLOSE button
located at the top right-hand of your screen
To add String Masters Content to a binder, do the following:
- Navigate to 'String Masters Studio'
- Scroll down to the 'Content Manager' section and click
'View My Binders'
- Select one of your existing Binders
- Click the FIND CONTENT button
- Within the 'Find Content' page, you can find content in two ways
Using categories
- Drill down to the category that you are interested in
- Once the Content you are looking for is found, click on it and it will be added to your Binder
- Additionaly, you can add Content from other binders or lessons by using the 'MY BINDERS' and 'MY LESSONS' categories
- Click the CLOSE button
located at the top right-hand of your screen
Using the search functionality
- Use the search field to find Content by name, author or instrument
- Once the Content you are looking for is found, click on it and it will be added to your Binder
- Click the CLOSE button
located at the top right-hand of your screen
To add a note to a binder, do the following:
- Navigate to 'String Masters Studio'
- Scroll down to the 'Content Manager' section and click
'View My Binders'
- Select one of your existing Binders
- Click the NEW NOTE button
- Enter Title and Text for note
- Click the SAVE button
located
at the top left-hand side of your screen
To add an assignment to a binder, do the following:
- Navigate to 'String Masters Studio'
- Scroll down to the 'Content Manager' section and click
'View My Binders'
- Select one of your existing Binders
- Click the NEW ASSIGNMENT button
- Enter Title and Text for assignment
- Click the SAVE button
located
at the top left-hand side of your screen
If your students pay for their lessons using String Masters then String Masters will send this payment through to you. We offer two methods of payment: Paypal and Check. We process payments every Friday. Your weekly payment includes all lessons conducted during the prior week up until the end of day Wednesday. String Masters deducts the standard $5 fee per lesson prior to sending you payment.
To setup how String Masters should pay you do the following:
- Navigate to your User Profile and scroll down to the section 'Settlement Details'
- Choose an option in the field 'Make payments to you by..'
- Update the field values that display for the payment option you selected
- Click the Save button
 at the
bottom of the profile screen
at the
bottom of the profile screen
To view all monies owing to you from String Masters do the following:
- Navigate to String Masters Studio and click on the option
'My Settlements'
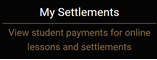 found in the Studio Set Up section.
- Each row represents a single lesson payment made by one of your students.
- The Amount field indicates how much String Masters owes you for the lesson
- The Settlement Status field indicates if your payment has been
processed yet.
- Pending means that the payment is upcoming and has not yet been processed
- Completed means that String Masters has sent you payment
- The Settlement Date field indicates the date that the payment was processed by String Masters.
Yes your students can pay for their lessons on String Masters and String Masters will then pay you. You are paid every Friday. Each weekly payment includes all lessons conducted during the prior week up until Wednesday End of Day. String Masters deducts the appropriate $3 or $5 fee per lesson prior to sending your payment. You can view the total amount owing to you from String Masters in your String Masters Studio under My Settlements.
Yes! If your student is paying you directly for lessons then your student does not need to pay for their lesson on String Masters. You, as the instructor, will be required to pay the lesson fee when you book the lesson.
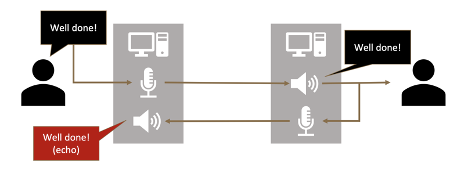
Echo typically occurs when the sound from a person’s speaker is being picked up by their own microphone and fed back into the call; this is illustrated in the image below. As a rule of thumb, if you hear your own voice echoing then the source of the problem is likely another attendee on the call. If someone else on the call is hearing their own voice echoing then you may be the source of the problem.
To determine which caller may be the cause of the echo do the following while on the call:
- Ask all participants to mute their own microphone.
- Have each caller un-mute their microphone one at a time until you hear the echo again thus identifying who is causing the echo.
Once you identify the caller that is causing the echo, ask this caller to try one or more of the following to eliminate the echo:
- Lower their speaker volume.
- Use headphones, if possible.
- If they are using an external microphone, ask them to ensure it is not positioned close to their speakers.
- If they are using external speakers, ask them to only use a single one if possible. If they cannot turn off the additional speakers, ask them to turn on the “mono” setting on the speakers if this option is available.
- Mute their microphone when they are not speaking or needing to communicate on the call.
- If possible, use a Chrome browser. Chrome provides the best sound experience with String Masters and should be used on all devices except the Apple iPad and Apple iPhone.
When using Google Chrome, some scenarios can occur which block your camera and microphone access. This blocks String Masters' ability to access your camera and microphone and gives the error “Something went wrong: General Audio/Video Error” when in the equipment selection screen. This can be fixed by manually granting String Masters the permission to access your camera and microphone. The video below provides a brief walkthrough of how to accomplish this on Apple computers and on Windows computers.
In online communications, sound can become choppy or cut in and out for a number of reasons but is most often due to poor network (Wi-Fi) connectivity, poor equipment connectivity (e.g. headsets) and/or large demand on your computer’s resources. To resolve choppy sound or sound that is cutting in and out try one or more of the following:
- Close any open applications that you are not using on your computer/mobile device.
- If you are using external headphones or an external microphone, ensure they are properly connected: cables are plugged in properly, wireless devices paired properly and within range of your computer/mobile device. If there are connection problems between these peripherals and your computer/mobile device, you may experience choppy sound.
- Switch to a wired Internet connection. This may improve your overall connectivity.
- Restart your computer/mobile device.
- Restart your modem and router. These are the devices which connect you to the Internet. Restarting them from time to time helps ensure your Internet connection is optimal.
- Troubleshoot possible network issues with your Internet Service Provider. Sometimes, poor network connectivity is a result of things happening outside of your control where your Internet Service Provider may be able to help.
- If possible, use the Chrome browser. Chrome provides the best sound experience with String Masters and should be used on all devices except the Apple iPad and Apple iPhone. On the Apple iPad and Apple iPhone you need to use Safari.
If your audio sounds muffled to others during a lesson then this may be a result of one or more of the following issues: your microphone, your web browser, your computer/tablet device, your lesson space or environment. To improve your sound quality and reduce sounding muffled try one or more of the following:
- Position your microphone at an optimal distance from your instrument or from your mouth. In general, microphones should be placed between 1 and 3 feet from the instrument or from your mouth.
- Ensure the microphone is oriented properly. Microphones are designed to receive sound optimally from a specific direction. Check to see from which direction your microphone best receives sound.
- Ensure there are no obstructions between the microphone and your instrument or mouth.
- Ensure your microphone, the microphone plug and the computer port/jack where you plug in the microphone is clean and free of dust and debris.
- Unplug your microphone then plug it back in.
- If you are using an audio interface, restart it.
- Restart your browser.
- Restart your computer/mobile device.
- If possible, use the Chrome browser. Chrome provides the best sound experience with String Masters and should be used on all devices except the Apple iPad and Apple iPhone. On the Apple iPad and Apple iPhone, use Safari.
- Remove any sources of background noise from the your lesson area. For more guidance on how to do this, see “I’m hearing background noise”.
Microphones are designed and built to handle specific frequency ranges. Typical microphones used in computers and mobile devices are designed to emphasize human speech while suppressing other frequencies. This means that sounds outside of the human speech frequency range may be quiet or not detected at all. These sound frequencies may include the high range of a violin and the low range of a cello or double bass. If your instrument is not heard at lower or higher ranges, try one or more of the following to increase your microphone’s response to lower and higher frequencies:
- Use a microphone which is more suited to your instrument’s frequency range. Very small microphones will be limited in their ability to pick up bass-range tones.
- If possible, use the Chrome browser. Chrome provides the best sound experience with String Masters and should be used on all devices except the Apple iPad and Apple iPhone. On the Apple iPad and Apple iPhone, use Safari.
Background noise typically occurs when a person’s microphone is picking up unwanted sounds produced by their own computer hardware or by other nearby sound sources. Background noise can be very distracting for others on the call so proactive planning to ensure you setup in a quiet, low noise area is recommended. If there are many people on a call, it may not be evident as to the source of the background noise. To determine which caller may be the cause of the background noise do the following while on the call:
- Ask all participants to mute their own microphone.
- Have each caller un-mute their microphone one at a time until you hear the background noise again thus identifying who is producing the background noise.
Once you identify the caller that is producing background noise, ask this caller to try one or more of the following to eliminate the background noise:
- Position their microphone away from any nearby sound sources.
- Remove sources of background noise from the area. This may include closing windows, turning off a fan, or moving to a quiet space.
- Use a headset. This may be helpful for chin-mounted instruments or vocals but not for instruments which are positioned far from the head (e.g. the cello and double-bass).
- Mute their microphone when they are not speaking, playing, or needing to communicate on the call.
- If possible, use the Chrome browser. Chrome provides the best sound experience with String Masters and should be used on all devices except the Apple iPad and Apple iPhone. On the Apple iPad and Apple iPhone, use Safari.
When using Google Chrome on an Android device, some scenarios can occur which block your camera and microphone access. This blocks String Masters’ ability to access your camera and microphone and gives the error “Something went wrong: General Audio/Video Error” when in the equipment selection screen. This can be fixed by manually granting Google Chrome the permission to access your camera and microphone. The video below provides a brief walkthrough of how to accomplish this on your Android device.
There can be several reasons why you are not able to hear others in a String Masters lesson. When this occurs, you and the other participants in the lesson may need to investigate and possibly alter their audio settings as described below.
Investigate Your Audio Settings
- Ensure that your speaker volume is not off or too low.
- Ensure that your speakers are working. Try playing audio from a different website other than String Masters to ensure your speakers are producing sound.
- If you are on a Windows device, ensure that your Chrome browser sound is not muted in your volume mixer.
- If you are on Apple Mac Device, ensure that the output volume for your preferred speakers is adequate.
- Ensure that your audio is being played through your preferred speakers. Bluetooth or wireless speakers may be connected to your device and preventing the sound from being played through your device’s speakers.
- If you are using external speakers or headphones, disconnect them from your device, then reconnect them.
- Restart your browser and re-enter the lesson.
- If possible, use the Chrome browser. Chrome provides the best sound experience with String Masters and should be used on all devices except the Apple iPad and Apple iPhone. On the Apple iPad and Apple iPhone, use Safari.
Investigating Other participant(s) Audio Settings
- Ensure that their microphone is not muted in the lesson. You can do this by checking if the microphone icon in their video window is red. If the icon is red, then their microphone is muted, and they must click this icon to unmute themselves.
- If they are using an external microphone with a mute button or switch, ensure that this button or switch is not ON.
- Ensure they have selected the correct microphone when they entered the lesson. They can access the equipment selection screen by disconnecting from the lesson with the red telephone button and reconnecting by clicking the green telephone button.
- Ensure they have allowed String Masters to have access their microphone. They can check that this permission has been set in their browser settings on Mac and Windows, and in their device settings on mobile devices.
- Ensure the input volume for their microphone is not off or too low.
- If they are using an external microphone, ask them to disconnect it from their device and then reconnect it.
- Ask them to restart their browser and re-enter the lesson.
- If possible, they should use the Chrome browser. Chrome provides the best sound experience with String Masters and should be used on all devices except the Apple iPad and Apple iPhone. On the Apple iPad and Apple iPhone, use Safari.
When using Safari on your iPad, some scenarios can occur which block your camera and microphone access. This blocks String Masters’ ability to access your camera and microphone and gives the error “Something went wrong: General Audio/Video Error” when in the equipment selection screen. This can be fixed by manually granting Safari the permission to access your camera and microphone. The video below provides a brief walkthrough of how to accomplish this on your iPad.